![How to Use a Telescope for Stargazing?[The Only Guide You’ll Need]](https://besttelescopereview.com/wp-content/uploads/2019/06/How-to-Use-a-Telescope-for-Stargazing.jpg)
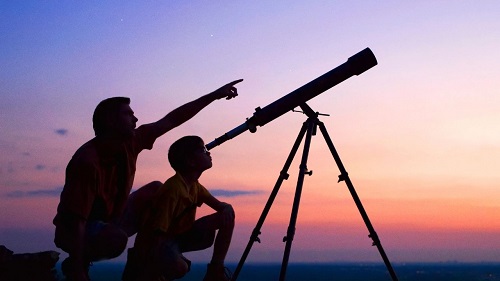
Stargazing using a telescope is one of the most interesting and eye appealing things to do in the world. Watching the stars closely and knowing more about them is always exciting. But there are some complications on using a telescope for stargazing. Today I am here with the answer to the question “how to use a telescope for stargazing?” So let’s get started.
Choosing the Right Telescope
Telescopes are not only used for stargazing but also used for many other astronomical purposes. However, stargazing is one of the most interesting tasks to do with a telescope. So, for that, you should know how many types of telescopes are there and which one is the best telescope for stargazing.
There are different types of telescopes and each one is best for a particular purpose. You will basically find three types of telescopes, reflector, refractor, and catadioptric telescope. So, which one would you choose for stargazing? Let’s see the details.
-
Reflector Telescopes
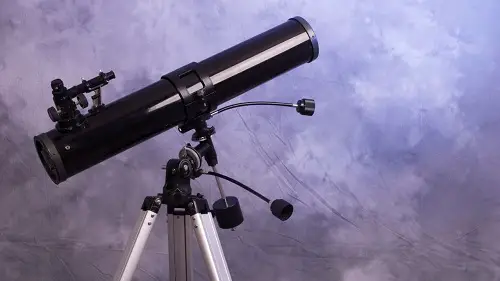
For the focusing of light, a reflector telescope uses a large mirror which is concave in shape. For a beginner, this is better than the other two. Because it usually has nice visibility.
Unfortunately, there is something irritating about this one. Water will likely condense on the mirror or optics of a reflector telescope. So, you cannot view or watch terrestrial objects using this one.
-
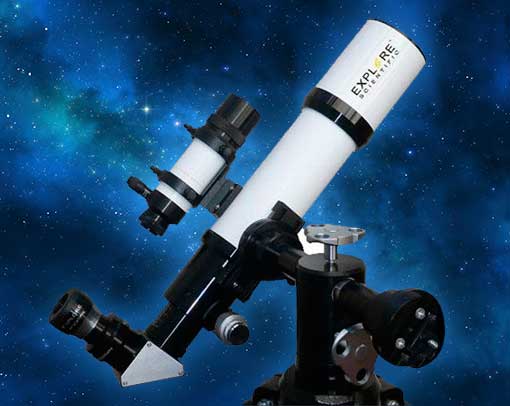
Refractor Telescope
A refractor telescope has a large tube which is very thin. In front of that, there is an objective lens. This lens helps to collect the rays of lights and focus them. You don’t need to maintain it much.
The refractor telescope is good for watching different planets and the Moon. This one usually gives a crisp and nice image. But for viewing galaxies and other faint objects this one is weak.
-
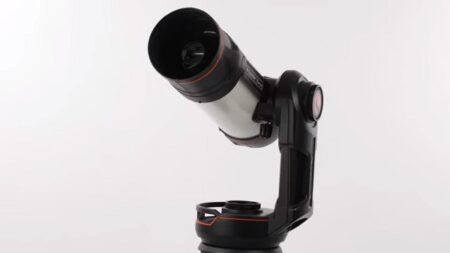
Catadioptric Telescope
As you have seen, one of the above telescopes uses mirrors while the other one uses lenses for focusing the rays of light. This one uses both. So, naturally, this one is the best stargazing telescope for beginners.
This one is very easier to carry than the other two. Also, the catadioptric telescope is more versatile. That means you can use it for other purposes aside from stargazing. But keep in mind that they are more expensive as well.
The Place You Choose Matters
For stargazing, not only the telescope matters but also the place you choose matters. You need to set the power level of the telescope according to the place you choose.
There might be light pollution which is sometimes better sometimes worse. Also, the weather matters in your chosen place, like there can be rain or fog according to different weathers.
If you want to bird watch terrestrial objects, then you should never pick a reflector telescope. Because it cannot show you the proper image.
Also, you are of course stargazing at night and so, you have to choose a place which dews frequently. In this case, a refractor or a catadioptric telescope is the best option.
Are You Stargazing Near Or Far?
The Moon and stars that are closer to our planet require a telescope which has a higher power. A sharp resolution and a good contrast are all you need in a telescope to view near stars.
So, in this case, a refractor or a reflector any telescope is with high power is enough. But if you are willing to stargaze at a far object like a nebulae or galaxies, then you have to have a bigger aperture. For this, a big reflector telescope is the best option.
Think about the Power Your Telescope Have
Never think that more power of a telescope means that you will have better viewing and higher resolution. This is a common mistake that many people do. But it’s not at all correct. High power will simply amplify the blurriness and also dilute the brightness.
There is a maximum amount of magnification fixed for any telescope. The amount is measured per inch of aperture and is 50-power. So, let’s say you have a telescope with a 6-inch reflector. This means you should not go higher than 300-power.
Magnifying any object too much will always result in a blurry image even if the lens is Barlow Lens. So, keep in mind that an image of a telescope can only be zoomed into a certain level.
Understand about the Telescope for Stargazing
For stargazing, you must understand how the telescope works and you have to know how things are operated. So, for this reason, there are a few major parts that you need to know about. These are
-
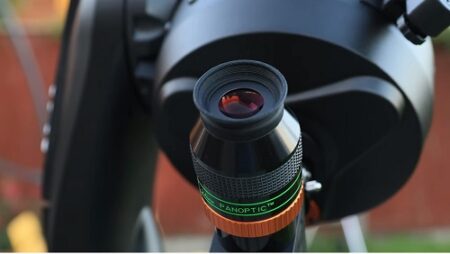
The Finderscope
A finderscope is a scope that you will find at the side of a telescope. A finderscope helps you to view more of the sky compared to the telescope itself.
For example, if you have a telescope with power 50, then it will show you a part of the sky which is almost as small as your fingertip. Whereas an 8x finderscope can show the portion of the sky which is as large as a golf ball.
-
The Mount
There are two types of telescope mounts available for each kind of telescopes given above. One of them is equatorial and the other one is altazimuth. You must know which type of telescope mount you have in order to operate it for stargazing.
The altazimuth mount can go side to side and also up and down. This is how it operates. For a beginner, this one is easier to operate. This telescope mount is simpler compared to the equatorial mount.
On the other hand, the equatorial mount will swing diagonally to the celestial East to West and North to South. You need to make sure that the polar axis is aligned to the North Star which is known as the Polaris.
The telescope can then pursue the sky’s motion around this point and move from the east side to the west side. This is the direction where the stars move.
It will take you a little time to get used to the equatorial mount. Because you have to unlock the axis each time you want to view different planets and stars.
After unlocking the axis you have to aim at the object’s body with the finderscope and then lock it. This mount is more helpful than the Altazimuth mount.
-
The Tripod
For stargazing one of the important parts is to properly balance the telescope. If you don’t balance properly, the telescope can fall and loose get damaged. Also, make sure you choose a flat surface to place the telescope while stargazing.
It’s Time to Scan the Sky
Now that you know about the telescope, how it works, and which one you should have for stargazing, it’s time for you to know about how you can work with the sky.
I have prepared some steps for you to follow to choose the right time for stargazing. The steps are
-
Learn about the Sky
You have an expensive telescope and its night time. So you take the telescope out and look up in the sky. This is not the way how stargazing works. First, you have to know what you are looking for.
Do you want to see the Moon, check out some planets nearby, or simply want to watch a meteor shower? You have to know about the time and the weather to check them out.
If you want to watch the stars only, then a moonlit night is not helpful for you. You can check out different books on constellations and stars. They can tell you about the timing and when is the best time to check out planets. My personal favorite is the NightWatch: A Practical Guide to Viewing the Universe.
Examining sky charts can help you to point out your telescope when it’s dark outside. Most importantly you have to train your eyes more and more so that you can observe all the details when you are stargazing.
-
Choose the Right Spot
You have to be very careful about choosing the spot from where you want to stargaze. A place where you can have access at night and is safe at night should be considered. Also, the spot should have a solid plain surface so that the telescope can stay stable.
Light pollution will definitely occur if you are stargazing from a big city. So, go as high as you can. A tall building rooftop can help you decrease light pollution.
-
Keep Practicing
You have to practice setting up the telescope and also pointing to the right direction. The more you practice the better you will be at watching stars more clearly. If you don’t practice enough, you will always lose the right time and the right spot.
-
Comfort is Also a Priority
Finally, stargazing at night will definitely take a long time for you. So you have to make sure you are wearing proper clothes in case it’s cold outside. Also, use bug repellers to keep disturbing bugs away from you at night.
FAQ (Frequently Asked Question)
Question: What Telescope is good for stargazing?
Answer: For a beginner, a telescope used for stargazing should have an aperture equal or more than 5. This will help you to see things clearly. Also, make sure the telescope you use is not hard to carry so that you can move it when it’s necessary.
Question: Where can I stargaze?
Answer: You have to pick a place where there is no or very little light pollution. The top of a hill is the best place for stargazing. But in cities, such places are hard to find. In this case, you can choose a tall building rooftop so that the city lights don’t get in your way.
Question: How does the moon affect stargazing?
Answer: A moonlit night or a night with a full moon is the worst time for stargazing. Because the light of the moon blocks the starts from being seen. On the other hand, when the moon is not full you can clearly see the stars and even the line of the Milkyway can be seen then.
Question: How do you start stargazing?
Answer: To start stargazing you have to choose the right telescope first. After you have chosen the right telescope you have to pick the right spot. Finally, after choosing the spot, you have to wait for the right time when the stars are clearly visible for stargazing.
Question: Do you need a telescope to stargaze?
Answer: You can view stars with bare eyes. This has its own beauty. But if you want to have a closer and clearer look at different stars, then you surely need a telescope. The best type of telescope for stargazing can easily be found online or in shops around you.
Question: What time should I stargaze?
Answer: Of course you should stargaze during midnight. Dusk or dawn is not a good time for stargazing. But you cannot stargaze on any midnight you want. Make sure the night you choose has very little moonlight so that you can clearly view the stars.
Question: Where is the best stargazing in the world?
Answer: I have found eight spots where you can have the best stargazing in the world. These spots are
- Tenerife, Canary Islands.
- Atacama Desert, Chile.
- Aoraki Mackenzie International Dark Sky Reserve, New Zealand.
- NamibRand Nature Reserve, Namibia.
- Nova Scotia, Canada.
- Mauna Kea, Hawaii.
- Cherry Springs State Park, Pennsylvania.
- Jasper National Park, Canada.
Question: What do you need for stargazing?
Answer: For stargazing, all you need is a clear sky to view the stars. Also, a powerful telescope that can help you to see the stars clearly.
Question: Can you see stars during a full moon?
Answer: Unfortunately, you cannot see stars during a full moon. The light of the moon will block the view of the stars. A full moon emits the most light at night. During that time stars are very hard to see.
Conclusion
My final tip for you would be to use a cheaper telescope for stargazing as a beginner and then when you become a pro go for the more expensive and complicated ones. So, this was everything you should know about how to use a telescope for stargazing. I hope this article was helpful to you.
Hi, Daniel Here! When I’m not busy working at my own startup, you may find me roaming around the Univers and whats beyond our sky, telescope is a must.